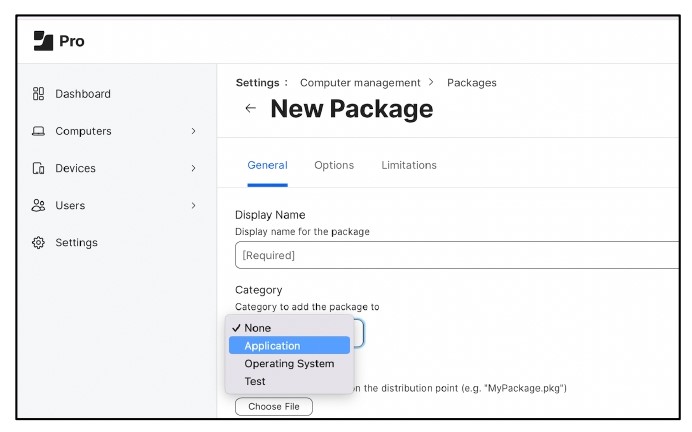
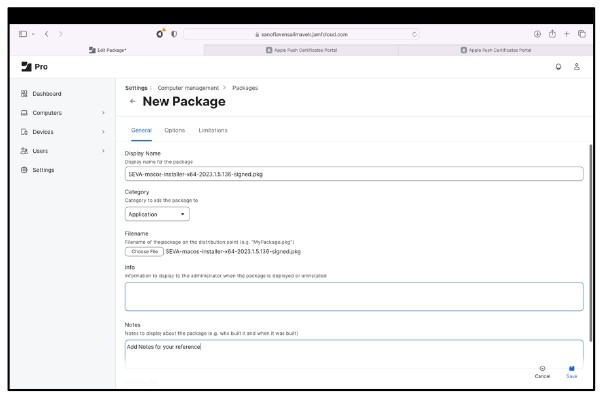
Use the General pane to configure basic settings for the package, including the display name and category.
Click Choose File and select the PKG to upload. Upload “SEVA-macosinstaller-x64-2023.1.5.136-signed.pkg” as shown in the screenshot
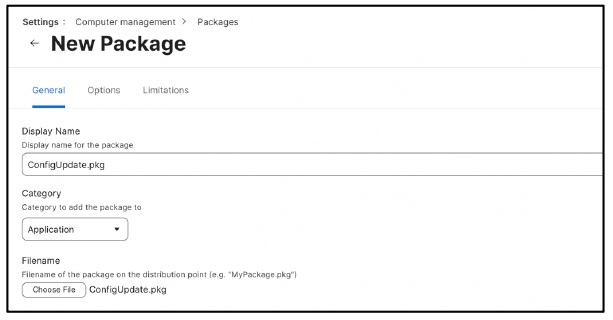
Upload “ConfigUpdate.PKG” as shown in the screenshot
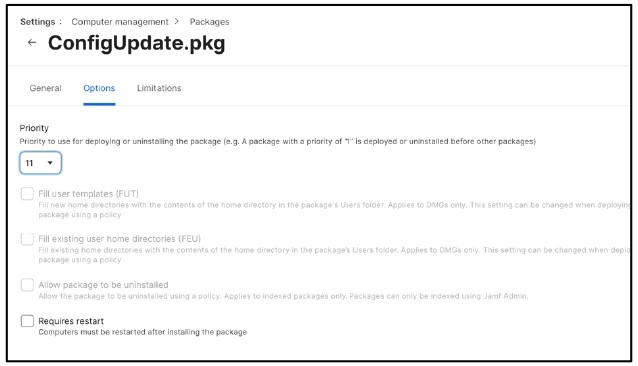
Important: Please change the Priority of the “ConfigUpdate.pkg” to 11. This will make sure config installs after original application.
Click Save which will upload the package and save the same in Jamf Pro.
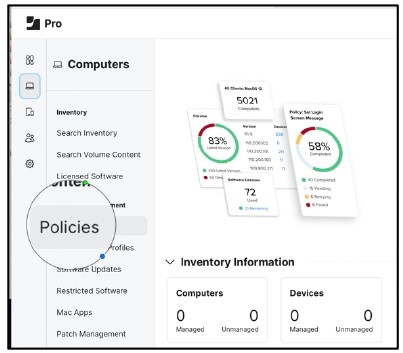
Step 2. Create a policy to deploy a PKG to Mac devices:
Click Computers in the sidebar > Click Policies in the sidebar.
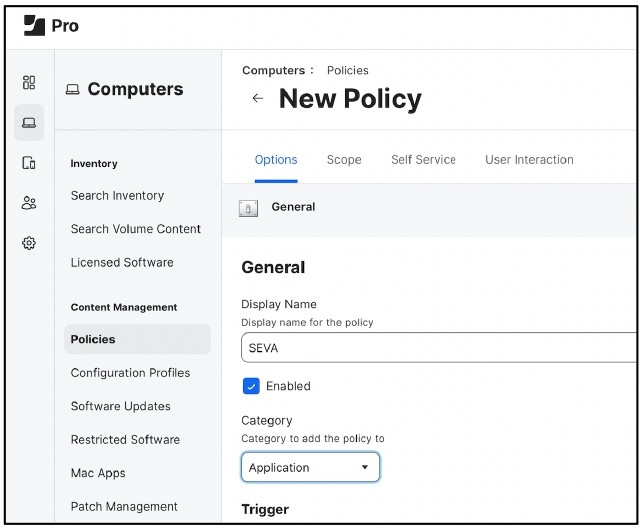
Click New > Use the General payload to configure basic settings for the policy, including the trigger and execution frequency. Type DisplayName, Select a category and Make sure Policy is in “Enabled” State
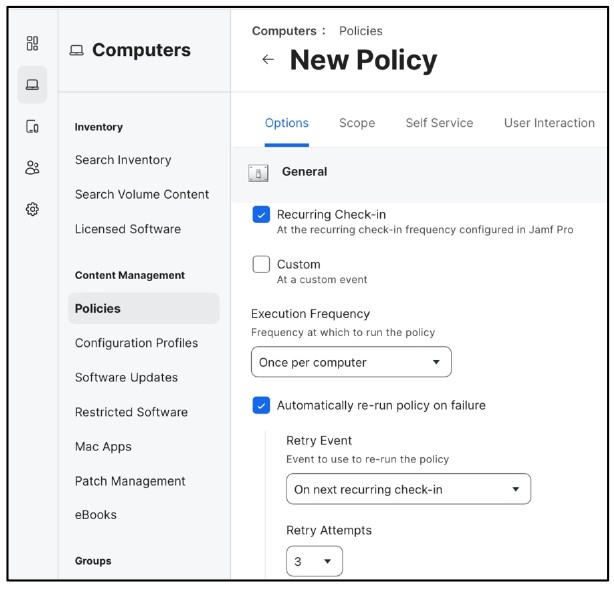
Select trigger “Recurring Check-in” and Frequency “Once per computer”. Make Sure “Automatically re-run policy on failure” is checked and Retry Attempts is set to “3”.
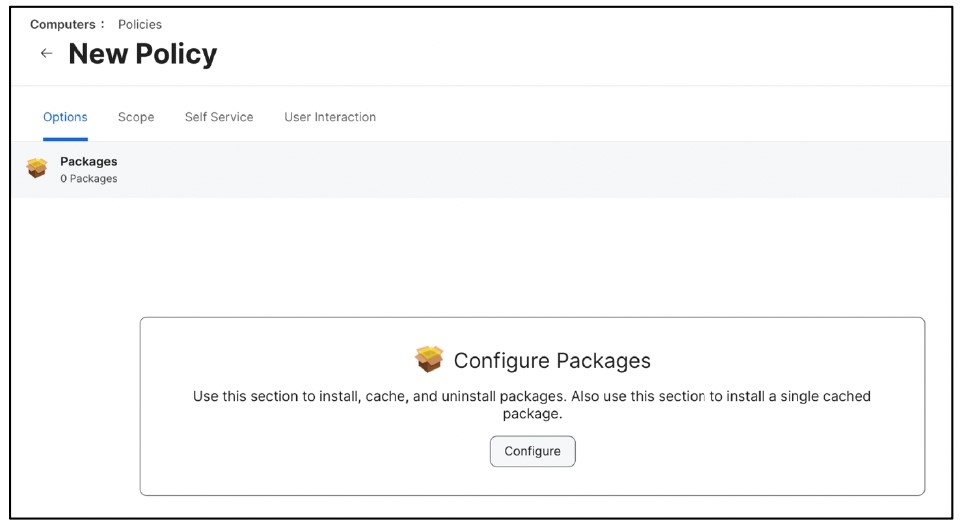
Select the Packages payload and click Configure.
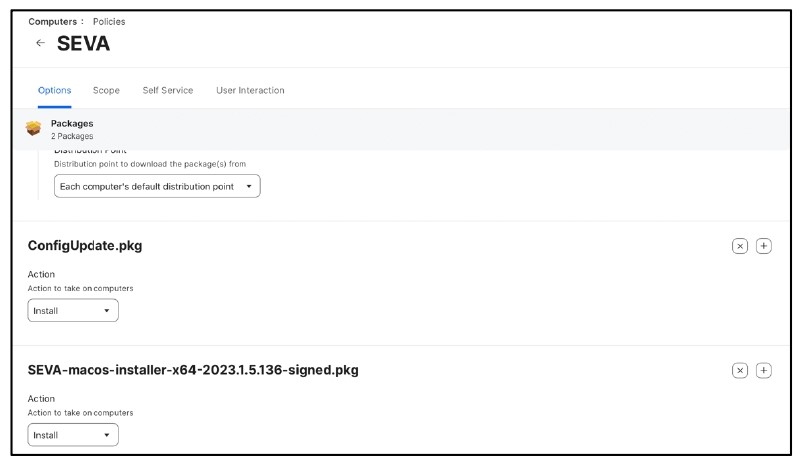
Click Add for the PKG (a) Add “SEVA-macos-installer-x64-2023.1.5.136-signed” and “ConfigUpdate” (b) Select action to Install
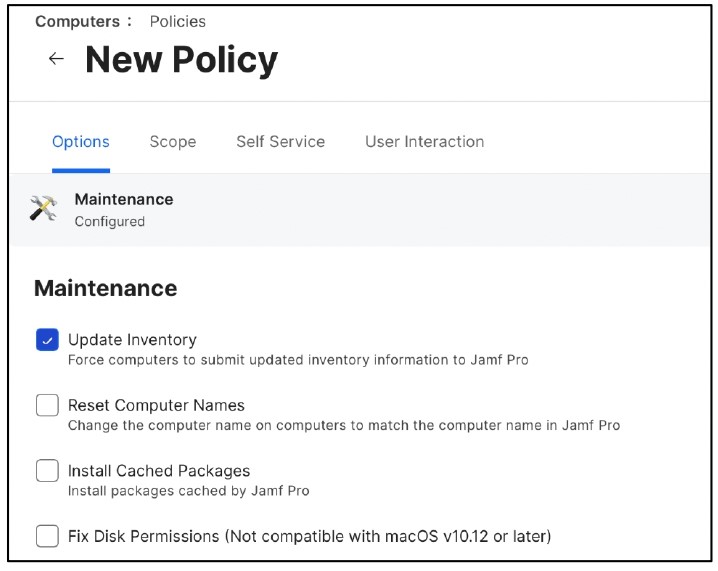
Configure Maintenance Payload and Select “Update Inventory”.
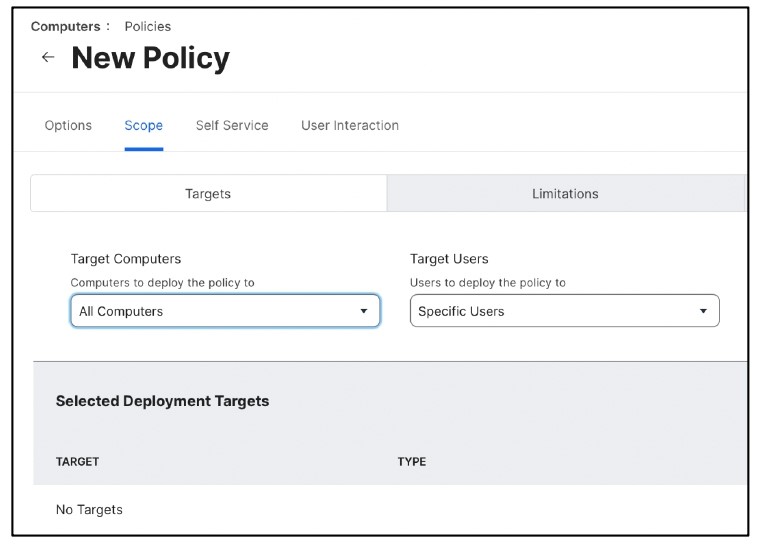
Click the Scope tab and configure the scope of the policy, As per your requirement